
7 Habits That Extend the Lifespan of Shower Door Gaskets
Last Updated: November 20, 2026
Quick Summary
Extending the lifespan of shower door gaskets comes down to a few habits: dry them daily, clean them weekly, inspect them monthly, and replace them with quality material when the time comes. Daily drying removes the standing water that carries dissolved minerals and feeds mildew, while weekly cleaning stops mineral film from hardening.
- Squeegee the glass and dry the seal after every shower, which takes about 30 seconds.
- Clean seals weekly with a mild cleaner and soft cloth, then rinse and dry fully.
- Descale monthly with equal parts white vinegar and water in hard-water areas.
- Check alignment and tighten hardware every six months to stop seals dragging.
- Replace worn seals every three to five years, choosing flexible UV-stabilized material.
Table of Contents
- Why Shower Door Gaskets Fail Sooner Than They Should
- How Long Do Shower Door Seals Last?
- Signs Your Shower Door Gasket Needs Replacing
- How to Clean Shower Door Seals Without Damaging Them
- A Repeatable Maintenance Schedule That Works
- Troubleshooting Leaks Before You Replace the Seal
- Shower Door Seal Replacement: Removal, Measurement, and Installation
- Choosing Replacement Seals That Last Longer
- Frequently Asked Questions
Why Shower Door Gaskets Fail Sooner Than They Should
The gasket is rarely to blame.
A shower door gasket is the flexible strip along the edge of the glass, sealing the gap between door and wall, frame, or floor. It keeps water inside the enclosure and absorbs impact when the door closes.
Two forces do most of the damage: water chemistry and daily wear.
Water Hardness and Mineral Deposits
Hard water is the quiet killer of rubber seals. Water carries dissolved calcium and magnesium; when it evaporates off the seal, those minerals stay behind as a chalky film.
Over time the seal loses flexibility and cracks when the door moves, and the rough surface lets mold and mildew take hold.
Daily Use, Heat, and Wear and Tear
Every shower cycle flexes the gasket: hot water softens the material, then it cools and stiffens again. Several times a day, every day, and the rubber fatigues.
Add the mechanical side: the door swings, the seal drags, and the glass presses against it.
UV light from a bright bathroom window adds another stress. Cheap seals discolor and go brittle. UV-stabilized material holds up far better.
How Long Do Shower Door Seals Last?
Lifespan depends on water hardness, shower frequency, and maintenance.
- Shower frequency: a household of four wears a seal faster than a guest bathroom used twice a week.
- Water hardness: hard water shortens service life through mineral buildup.
- Cleaning habits: regular cleaning with a mild cleaner adds years.
Signs Your Shower Door Gasket Needs Replacing
Replace your shower door gasket when it shows cracks, brittleness, discoloration that won't clean off, or a persistent leak that returns after cleaning.
Check for these signs during your monthly inspection:
- Cracks or splits along the flexible flap
- Stiffness where the seal used to flex easily
- Yellow or brown discoloration that survives cleaning
Discoloration is the one people ask us about most. A stained seal isn't always a failed seal, but once mold grows into the material, cleaning only reaches the surface. If you're unsure, the answers to common seal questions cover sizing and replacement basics.
How to Clean Shower Door Seals Without Damaging Them
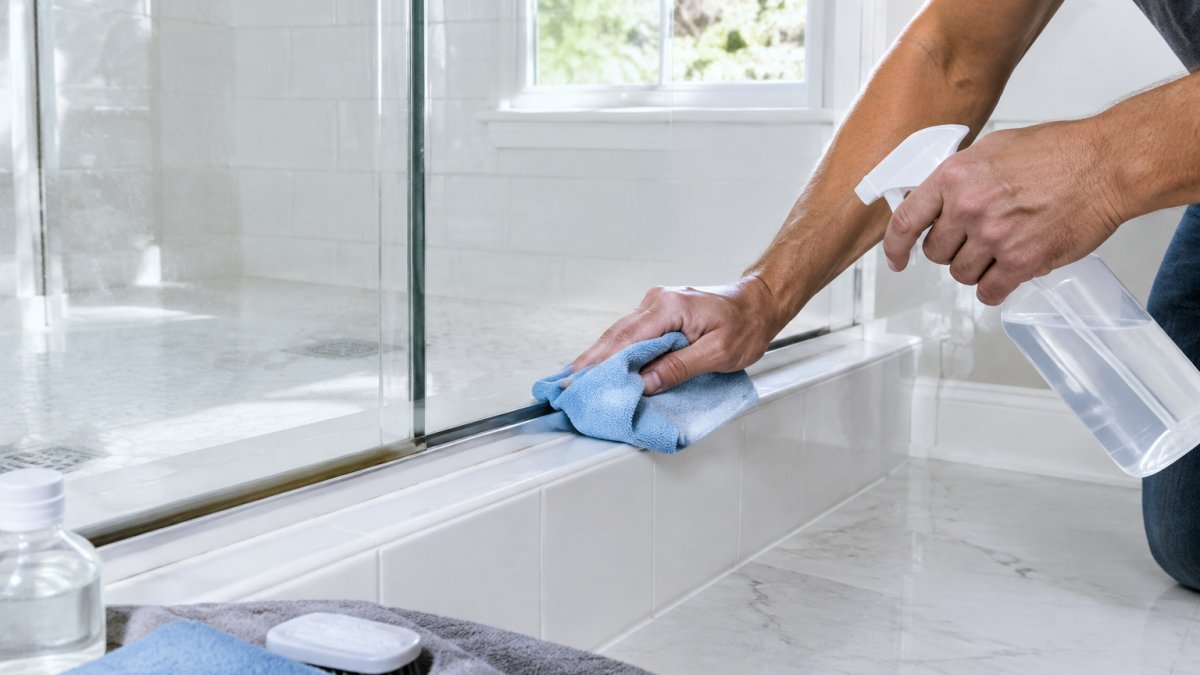
Clean shower door seals weekly with a mild cleaner and a soft cloth, then dry them completely. That routine prevents most of the damage we see in the field; harsh chemicals and abrasives do more harm than the dirt they remove.
Weekly Cleaning Routine
- Rinse the seal with warm water to lift loose soap scum.
- Spray a mild cleaner onto a soft cloth, not directly onto the seal.
- Wipe along the flap with light pressure. Never pull the seal away from the glass.
- Reach the channel with a soft brush or a cloth wrapped around a finger.
- Rinse again with clean water.
- Dry fully with a separate dry cloth.
Never use a scraper, steel wool, or a stiff brush on the seal, a single scrape can start a tear that spreads with every door swing. Avoid bleach-heavy and acidic cleaners too; they dry out the rubber and speed up cracking.
If you want the full step-by-step with photos and support options, the installation and support center walks through cleaning and care in detail.
Managing Hard Water and Mineral Deposits
For hard water, add a monthly descaling step: mix equal parts white vinegar and water, wipe it on the seal, let it sit a few minutes, then rinse and dry. Vinegar dissolves calcium film without attacking the rubber.
A squeegee after every shower cuts mineral buildup dramatically. So does a quick towel dry of the seal itself.
A Repeatable Maintenance Schedule That Works
This is the schedule we recommend to homeowners and property managers alike. It targets the two failure mechanisms that actually shorten seal life: mineral film and trapped moisture.
| Frequency | Task | Time Needed |
|---|---|---|
| After every shower | Squeegee glass and dry the seal with a towel or squeegee | 30 seconds |
| Weekly | Clean seal with mild cleaner and soft cloth; rinse and dry | 5 minutes |
| Monthly | Inspect for cracks, stiffness, and mold; descale with vinegar if needed | 10 minutes |
| Every 6 months | Check alignment and door operation; tighten hardware; inspect sweep and channel | 15 minutes |
| Every 3-5 years | Replace worn seals | 30-60 minutes |
Run the bathroom fan during and after showers. Good ventilation is the cheapest mold prevention there is.
Why Each Interval Exists
The daily dry isn't about cleanliness. It removes the standing water that carries dissolved minerals and feeds mildew.
The weekly clean removes soap scum and the first film of mineral deposit before it hardens.
The six-month check is the one most homeowners skip. Hardware loosens, hinges sag, and the seal starts dragging instead of gliding, and a dragging seal wears through its flap in months.
Adapting the Schedule to Your Household
- Hard water: move descaling from monthly to every two weeks. If white film returns within a week of cleaning, you are in a hard-water area and should descale more often.
- High-use household: a family of four showering daily wears a seal roughly twice as fast as a guest bathroom used twice a week. Shorten the inspection interval to every two weeks.
- Poor ventilation: a bathroom without a working fan or window should get a daily towel dry of the seal and a weekly mold check, not just a monthly one.
Material-Specific Care
Silicone seals tolerate vinegar well and stay flexible across a wide temperature range.
PVC seals are common on frameless doors because they're clear and inexpensive, but they're more prone to yellowing and stiffening.
Rubber seals are flexible but degrade faster with heat and UV.
Magnetic seals need the magnet channel kept dry and free of grit, which wears the strip and weakens the pull.
Troubleshooting Leaks Before You Replace the Seal
Diagnose the leak by where the water appears and what the door does when it closes. Work through the causes below from cheapest to fix to most expensive.
Step 1: Locate the Leak
Dry the floor and the outside of the enclosure completely. Run the shower for two minutes with the door closed and watch where water first appears. The location narrows the cause:
- Water at the hinge side: the hinge seal or the door alignment is the likely cause. A sagging door pulls the seal away from the wall.
- Water at the strike side (the handle side): the strike seal or the door latch is the likely cause. A door that does not close flush leaves a gap the seal cannot bridge.
- Water at the bottom, outside the curb: the bottom sweep or drip seal is the likely cause, or the curb is not pitched correctly.
Step 2: Rule Out Alignment and Hardware
A door that sags or rubs won't seal evenly, no matter how new the gasket is. Check these before touching the seal:
- Open and close the door slowly. If it rubs, binds, or needs a push to latch, the hinges are loose or the door has dropped.
- Look at the gap between the door and the wall. It should be even from top to bottom. A wedge-shaped gap means the door is out of plumb.
- Tighten the hinge screws. Loose hinges are the most common cause of a sudden leak on a door that used to seal fine.
If tightening the hardware closes the gap and the leak stops, the gasket was never the problem.
Step 3: Check the Seal Itself
If alignment is good, inspect the seal for the failure modes that actually cause leaks:
- Not fully seated: the seal has slid out of its channel or off the glass edge. Push it back into place and test again.
- Wrong profile: a hinge seal on the strike side, or a bottom sweep used on a vertical edge, will not seal. The profile must match the location.
- Wrong glass thickness: a seal sized for 1/4 inch glass on a 3/8 inch door will not grip. It will gap and leak.
Step 4: Rule Out Drainage and Sweep Problems
Some leaks aren't seal leaks at all:
- Clogged weep holes or drain channels: frameless enclosures often have small weep holes in the bottom channel. If they clog, water backs up and escapes outside the shower. Clear them with a soft brush.
- Damaged door sweep: the sweep at the bottom of the door is a separate part from the gasket. A torn or stiff sweep lets water run under the door. Check it separately.
- Curb pitch: if the curb or threshold does not slope toward the drain, water pools and finds the lowest point, usually outside the enclosure. This is a construction issue, not a seal issue.
When to Replace
If the leak persists after alignment, seating, and drainage are ruled out, the seal is the problem. If you cannot pin down the source, the team can help you identify the right seal before you order. Replacing a seal that was never the cause wastes money and does not stop the water.
Shower Door Seal Replacement: Removal, Measurement, and Installation
Replacing a shower door seal is a DIY job for most homeowners. The key is measuring glass thickness and seal profile correctly before you order.
- Remove the old seal. Slide it off the glass or peel it from the channel. No tools needed on most frameless doors.
- Clean the glass edge and let it dry completely.
- Measure the glass thickness with a caliper. Common sizes are 1/4 inch, 3/8 inch, and 1/2 inch.
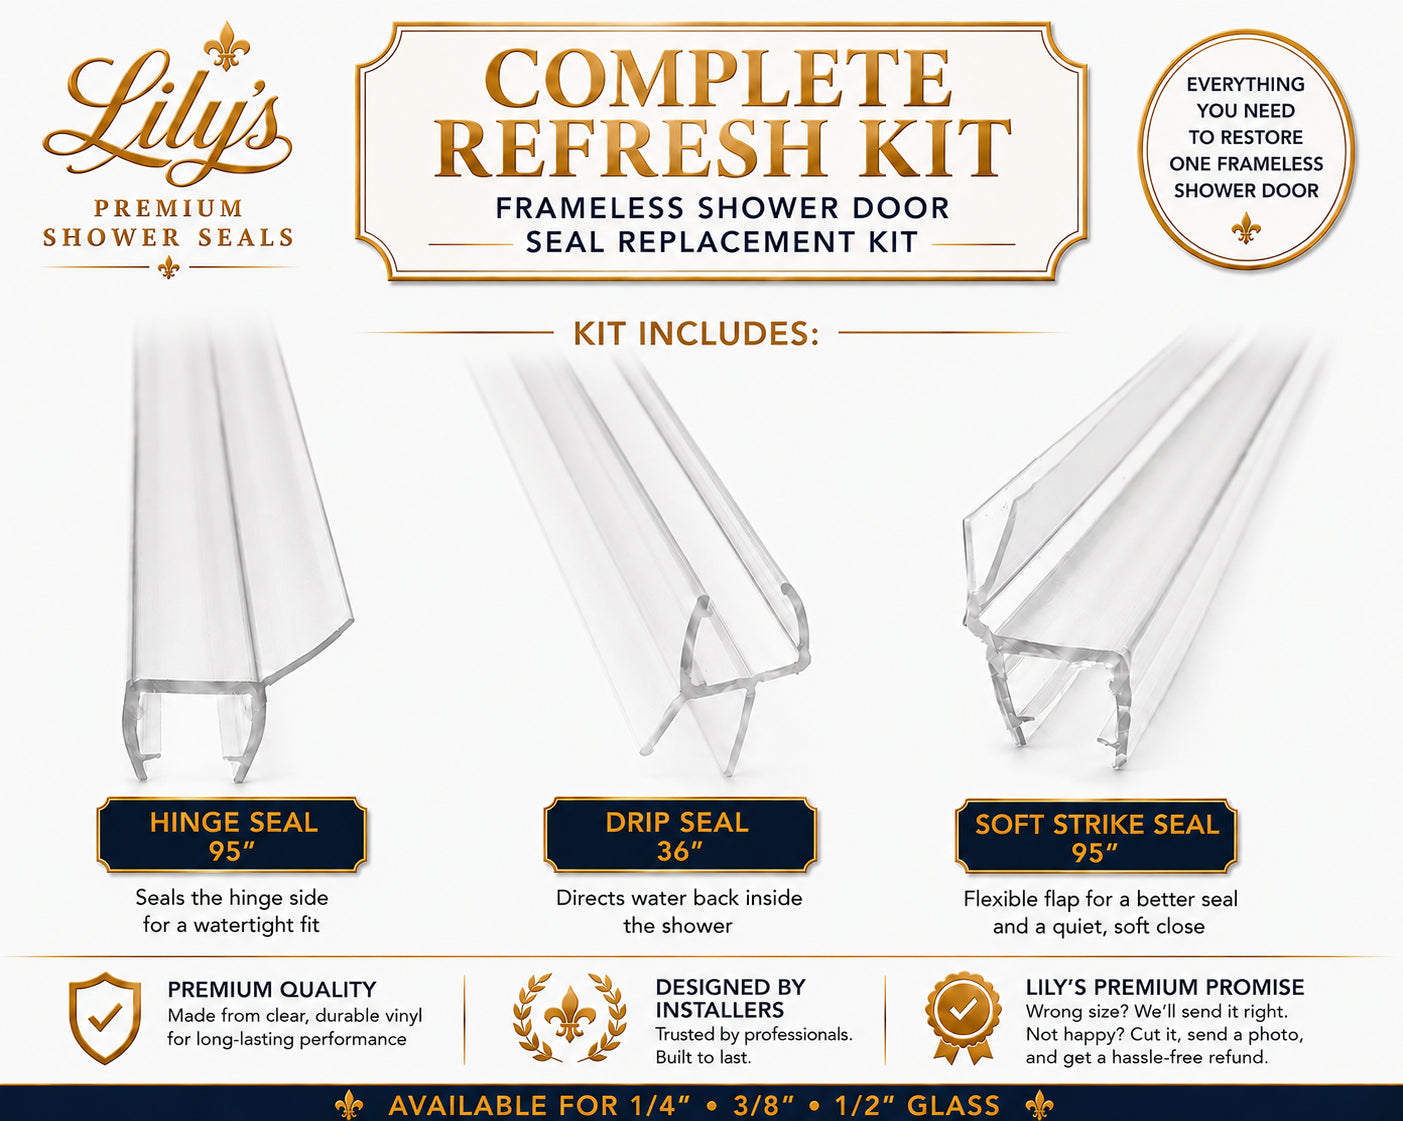
- Note the seal profile. Hinge side, strike side, and bottom drip seals are different shapes.
- Order the correct size. Our seals come in all three common glass thicknesses.
- Trim to length with sharp scissors.
- Slide the new seal on. No adhesive required.
- Close the door slowly and check for even contact.
If you're refreshing a whole door, the Complete Refresh Kit includes a hinge seal, a soft strike seal, and a drip seal in one box, the fastest path for a full restoration.
Choosing Replacement Seals That Last Longer
Choose a replacement seal made from flexible, UV-stabilized material that matches your glass thickness exactly. Material quality is the difference between three years and five or more.
What most guides miss is the impact factor. Stiff plastic seals bang against the glass on every close. That shock is what cracks them.
- Confirm the seal fits 1/4, 3/8, or 1/2 inch glass.
- Look for crystal-clear PVC so the seal disappears against the glass.
- Check that the seal slides on without adhesive.
You can browse the full range of drip seals to match your door setup.
Frequently Asked Questions
How often should shower door gaskets be replaced?
Replace yours when you see cracks, brittleness, yellowing, or a persistent leak that cleaning and realignment do not fix. A monthly inspection makes it easy to catch wear early, so you replace a worn seal before it damages the glass or the floor.
What is the best way to clean a shower door gasket?
Use a mild cleaner and a soft cloth or sponge, then rinse and dry the seal completely. Avoid harsh chemicals, abrasive cleaners, and stiff brushes, which strip the material and speed up cracking. For mineral deposits from hard water, a diluted white vinegar solution works well on most seals, but test a small area first and rinse thoroughly so the residue does not sit on the rubber.
Does drying a shower door gasket after each shower help it last longer?
Yes. Mold and mildew need moisture to grow, and a seal that stays wet between showers breaks down faster. Squeegee the glass and wipe the gasket with a soft cloth after each use, and run the bathroom ventilation fan for 15 to 20 minutes.
Can the wrong shower door seal damage a glass shower door?
It can. A seal sized for the wrong glass thickness may not grip properly, letting the door shift and creating glass-to-metal contact that stresses the panel. Always match the seal to your glass thickness, which is commonly 1/4 inch, 3/8 inch, or 1/2 inch, and confirm the seal sits flush with proper alignment before tightening anything.
